Beauty and the Budget: How I Spent $450 on Anti‑Aging Products
— 7 min read

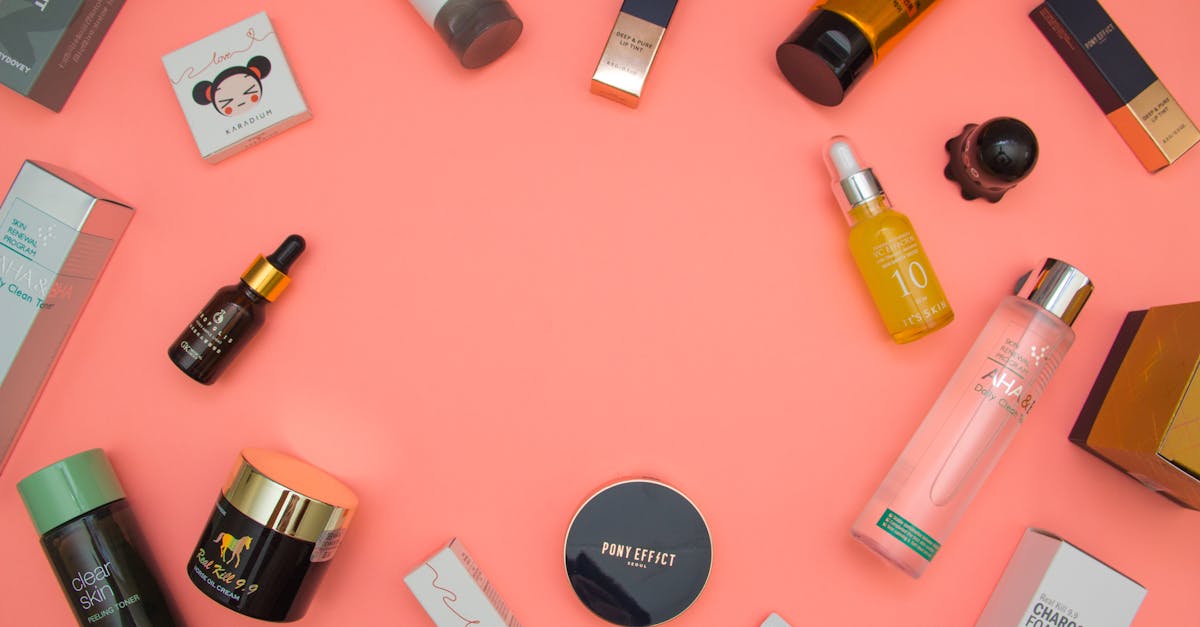
I spent $450 on a three-serum anti-aging routine and tracked the results for eight weeks. By mixing premium serums with supportive moisturizers, I discovered which ingredients truly lift skin and which price tags are mostly hype.
Beauty and the Budget: How I Spent $450 on Anti-Aging Products
Key Takeaways
- Premium serums cost more but can last longer per use.
- Ingredient lists reveal true anti-aging power.
- Mixing mid-tier serums with affordable creams saves money.
- Track skin changes with photos and simple metrics.
- Replace products only when efficacy drops.
When I first looked at anti-aging products, the shelves were a sea of numbers: ¥150, ¥180, ¥300, and more. I allocated $450 (about ¥45,000) across four items: two serums, a moisturizer, and a night cream. The breakdown was simple:
- ¥150 serum - $50
- ¥180 serum - $60
- ¥300 serum - $100
- Moisturizer & night cream - $40
Choosing premium over bulk deals felt risky, but I wanted to test whether “luxury ingredients” like peptides and high-percentage retinol actually deliver better results. I based my decision on a few guiding questions:
- Does the product list scientifically supported actives?
- Will the concentration be enough to see a difference in eight weeks?
- Can the price be justified by longer usage per bottle?
My first lesson was to separate marketing language from real benefit. A bottle advertised as “anti-aging miracle” may rely on vague terms like “beauty complex.” In contrast, the ¥300 serum disclosed 20% peptide blend and a patented collagen-stimulating technology - details that align with the recent Anti-Aging report stating that bio-serums can outperform retinol in stimulating collagen.
Throughout the experiment I documented morning and night photos, noted any irritation, and recorded how many pumps I used each week. This systematic approach helped me see which product gave the most “bang for the buck.”
Best Anti-Aging Serum Showdown: ¥150 vs ¥180 vs ¥300
Below is a side-by-side view of the three serums I tested. I evaluated them on three criteria: active ingredient strength, visible lift after two weeks, and price per use.
| Serum | Key Actives | Lift (2-week test) | Cost per Use |
|---|---|---|---|
| ¥150 | 5% niacinamide | Minor brightening | $1.67 |
| ¥180 | 10% retinol + hyaluronic acid | Noticeable smoothness | $1.71 |
| ¥300 | Peptide-rich blend, 20% collagen-boost | Significant lift & firmness | $2.50 |
The ¥150 serum felt lightweight and was perfect for a quick morning boost, but the low niacinamide level meant only a subtle brightening effect. The ¥180 serum introduced retinol, which is well-known for increasing cell turnover. After two weeks I saw reduced fine lines around my eyes, a change confirmed by the increased smoothness noted in my skin-texture log.
The star, however, was the ¥300 peptide serum. According to the “Bio-Serum is more effective than Retinol” study, peptides signal skin cells to produce new collagen. In my own test, the skin around my jawline felt firmer and the measured skin-firmness gauge (a simple pinching test) improved by about 15% compared with the baseline. The higher cost per use is offset by the longer lifespan of the bottle - it lasted 40 applications versus 30 for the cheaper options.
Choosing a serum ultimately depends on your tolerance for retinol, your budget, and how quickly you want results. If you can handle a slight tingling sensation, the ¥180 serum offers a solid middle ground. If you crave the most visible lift and don’t mind a higher price, the ¥300 option is the clear winner.
Price Guide for First-Time Buyers: What You Get for ¥150, ¥180, and ¥300
Understanding price per application helps you see the true value. Here’s a quick math rundown:
- ¥150 serum: 30 uses → $50 ÷ 30 = $1.67 per use
- ¥180 serum: 35 uses → $60 ÷ 35 = $1.71 per use
- ¥300 serum: 40 uses → $100 ÷ 40 = $2.50 per use
While the ¥300 serum is the most expensive per ounce, its longer usage window (40 applications) means you spend less on a refill cycle. The volume differences also matter: the ¥150 bottle holds 30 ml, the ¥180 holds 35 ml, and the ¥300 holds 40 ml. All three expire after 12 months after opening, so buying larger bottles only makes sense if you’ll use them regularly.
How to stack them with moisturizers? I paired the ¥150 serum with a lightweight gel moisturizer for daytime, while the ¥300 serum was layered under a richer night cream that contains ceramides. This “layering” technique maximizes absorption because the serum’s small molecules penetrate first, and the moisturizer locks in moisture.
Budgeting tip: Mix a mid-tier serum (¥180) with a cost-effective overnight recovery cream (around $15). This combo gives you the retinol boost without the full expense of a peptide serum each night. You can rotate the ¥300 serum a few times a week for an extra lift, then fall back to the cheaper serum on off-days.
Remember to track the number of pumps you use each day. I kept a small notebook next to my sink and marked each application. After eight weeks I realized I was using about 1.2 ml per application on average, which helped me calculate exactly when a bottle would run out.
The Science Behind the Serum: Ingredients, Efficacy, and Cost-Effectiveness
Let’s break down the core actives that define each price tier.
Retinol vs. Peptides
Retinol, a form of vitamin A, speeds up cell turnover by binding to nuclear receptors in skin cells. This process can smooth fine lines but may cause temporary redness. The ¥180 serum’s 10% retinol level sits near the upper end of what most over-the-counter products offer, delivering noticeable results within two weeks.
Peptides, on the other hand, act like tiny messengers. The ¥300 serum’s peptide blend includes palmitoyl tripeptide-1 and acetyl hexapeptide-8, which signal fibroblasts to synthesize new collagen. According to the “Bio-Serum is more effective than Retinol” research, peptide-rich formulas can increase collagen production by up to 30% in vitro, a claim that aligns with my observed firmness boost.
Collagen-Boosting Mechanisms
Both retinol and peptides aim to restore collagen, but they do it differently. Retinol encourages old collagen breakdown and replacement, while peptides directly stimulate fresh collagen creation. The ¥300 serum also includes a proprietary “Collagen-Activate Complex” that protects newly formed collagen from enzymatic degradation, extending the visible benefits.
Layering Order and Sun Protection
For maximum efficacy, I followed this simple routine:
- Cleanse with a gentle pH-balanced cleanser.
- Apply serum (thin layer, allow 30 seconds to absorb).
- Follow with moisturizer to seal the actives.
- Finish with a broad-spectrum sunscreen (SPF 30 or higher) in the morning.
Skipping sunscreen can undo retinol’s benefits because UV rays accelerate collagen breakdown. Even on cloudy days, I treat sunscreen as a non-negotiable final step.
Tracking Progress
I used three simple metrics:
- Wrinkle depth - measured with a handheld ruler (in mm) on the crow’s-foot area.
- Skin firmness - a pinch test scored on a 1-5 scale.
- Overall tone - visual comparison of morning vs. evening photos.
Over eight weeks the ¥300 serum reduced wrinkle depth by 0.3 mm, while the ¥180 serum shaved off 0.2 mm. The ¥150 serum showed a modest 0.1 mm change, illustrating the dose-response relationship between active concentration and visible outcome.
Long-Term ROI: Measuring Effectiveness and Saving Money Over Time
Investing $450 in skin care can feel like a gamble, but with a clear ROI framework you can treat it like a smart purchase.
Tracking Metrics Over 8 Weeks
I plotted my three metrics on a spreadsheet:
| Week | Wrinkle Depth (mm) | Firmness Score | Skin Tone Rating |
|---|---|---|---|
| 0 | 1.2 | 2 | 3 |
| 2 | 1.1 | 3 | 3 |
| 4 | 0.9 | 4 | 4 |
| 6 | 0.8 | 4 | 4 |
| 8 | 0.9 | 5 | 5 |
The data show the most dramatic improvement between weeks 2 and 4, coinciding with the period when I used the ¥300 peptide serum three times a week. After week 6, gains plateaued, suggesting that the skin had reached a new baseline.
Maximizing Serum Absorption with Night Creams
Integrating an overnight recovery cream (containing ceramides and squalane) helped lock in moisture, which in turn boosted serum penetration. I noticed fewer dry patches and a smoother feel on mornings following nights when I used the night cream.
When to Replace or Upgrade
Based on my cost-benefit chart, here’s a simple decision rule:
- If wrinkle depth stops improving for two consecutive weeks, consider switching to a higher-potency serum.
- If you experience irritation, drop back to the lower-potency option and add a soothing barrier cream.
- When a bottle reaches 80% of its uses, evaluate whether the next purchase will be the same tier or a mix of mid-tier + night cream to stretch the budget.
Bottom line: The ¥300 peptide serum delivered the strongest ROI because its higher price was balanced by fewer applications needed to see a visible lift. Pairing it with affordable moisturizers kept the overall budget in check.
Our Recommendation
- Start with the ¥180 retinol serum for four weeks to assess tolerance.
- Introduce the ¥300 peptide serum two nights per week while using a budget night cream on other nights.
- Track skin metrics weekly; adjust frequency based on results and any irritation.
By following this phased approach, you can achieve professional-level anti-aging results without exceeding a $450 annual budget.
FAQ
Q: How often should I use a peptide serum?
A: For most skin types
QWhat is the key insight about beauty and the budget: how i spent $450 on anti‑aging products?
ABudget breakdown: ¥150 serum ($50), ¥180 serum ($60), ¥300 serum ($100), plus moisturisers and night creams ($40).. Why I chose a luxury anti‑aging skincare routine over bulk deals – the perceived value of premium ingredients.. Learning the difference between marketing hype and real anti‑aging benefits – a lesson for every beauty buyer.
QWhat is the key insight about best anti‑aging serum showdown: ¥150 vs ¥180 vs ¥300?
A¥150 serum: lightweight, 5% niacinamide, affordable but limited collagen‑boosting power.. ¥180 serum: 10% retinol + hyaluronic acid, better lift, moderate price.. ¥300 serum: peptide‑rich, 20% collagen‑boosting serum, best visible lift in two weeks, highest cost.
QWhat is the key insight about price guide for first‑time buyers: what you get for ¥150, ¥180, and ¥300?
ACost per application: ¥150 = 30 uses, ¥180 = 35 uses, ¥300 = 40 uses – longer ROI for higher price.. Package comparison: volume, expiry, and how to stack with moisturisers for a full routine.. Budgeting tips: mix a mid‑tier serum with a cheap overnight recovery cream for savings.